Dentrix is about to make some dramatic changes to the way you add new patient information in Dentrix. In this blog post, we’ll tell you what to expect so you can be ready for these improvements!
The current process can be improved. Using the current New Patient Appointment options, you can enter only limited information about the new patient. For example, you cannot connect a patient to their family, attach an insurance plan, scan and save a document, or enter health history information until the day of the patient’s first visit. That first visit might take place weeks or months after your first contact with the person! To work around these issues, some offices create the patient record early, directly in the Family File. But doing this can create confusion with your active patient count and mess with new patient reports.
Well, all of that is about to change! In an update coming soon to Dentrix, you’ll experience some relief for these concerns.
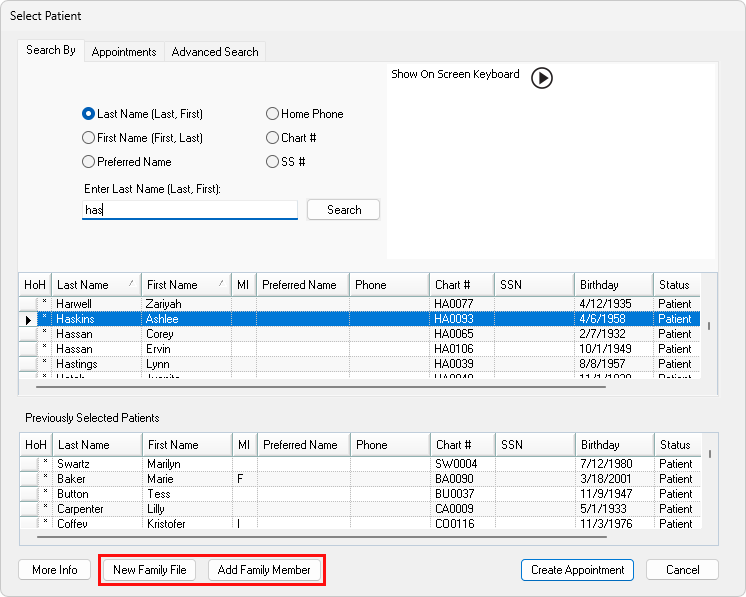
The first difference happens in the Select Patient window. Right away, you can set up a family relationship for the new patient! If the new patient should be part of an existing family, search for and select an existing family member. Then, click the Add Family Member button. If the new patient is to be the head of household for a new family, click the New Family File button.
Next, you’ll see the Head-of-House Information dialog box, where you enter the new patient’s information. Right away, you’ll notice that you’re not just entering minimal patient information. Here, you can enter all the same patient information that you can add in the Family File!
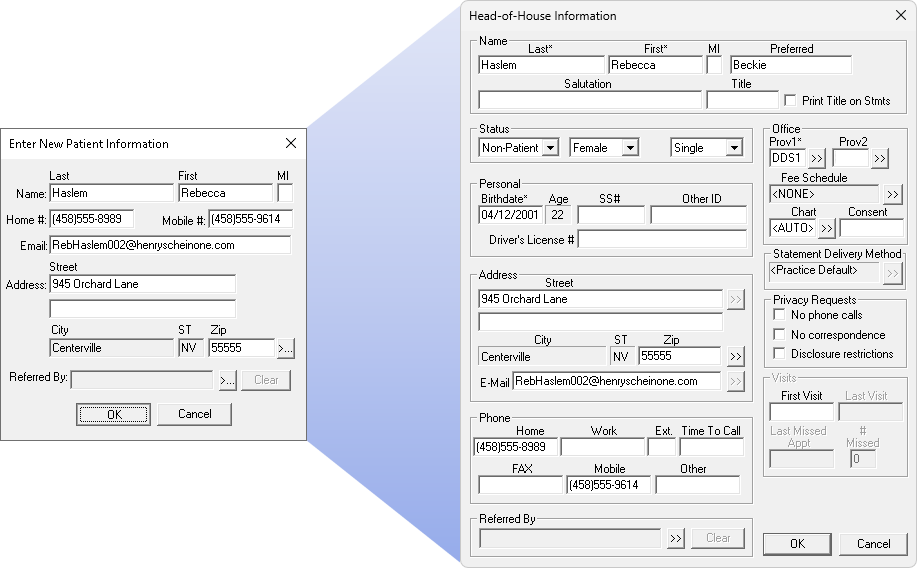
But notice that a couple of things are different:
- The patient Status will be set to Non-Patient.
- The First Visit Date will be empty.
It’s done this way on purpose. Later, when the new patient has procedure codes completed for the first time, their Status will automatically change to Patient and the First Visit Date will be populated for you.
Having a patient record created means that you’ll be able to treat this new patient just like any other established patient. For example, you can enter their insurance plan, send them appointment reminders, receive their online forms, update their health history, make notes in their Office Journal, scan or save documents, and so forth. It’s all available to you!
There’s one other change worth noting here: The patient’s birthday can now be set as optional or required. An administrator can set this in the General Options settings in Office Manager.
When the big day is here and the new patient arrives to your office, all you need do is Set Complete their appointment—just like any other appointment! You don’t need to convert their new patient appointment into a patient record, or race to get everything entered before the patient can be seen.
What Happens if the Patient is a No-Show?
In the old system, when you deleted the new patient’s appointment, all traces of the new patient were gone! You’ll never remember if they ghosted you forever, and you won’t find them again if they try to return sometime later.
Another improvement coming soon is that Dentrix will have a great tool for no-shows. Go ahead and break the appointment (like you would for other missed appointments). Because the new patient will exist as a non-patient, they can easily be searched for and found in your system. You can keep notes on their file and remember this history.
To make your follow-up even better, open the Appointment List and next to Select List, select the all-new Unscheduled New Patient list. This list shows all the broken appointments for new patients. Use this list to professionally follow up with these potential patients.
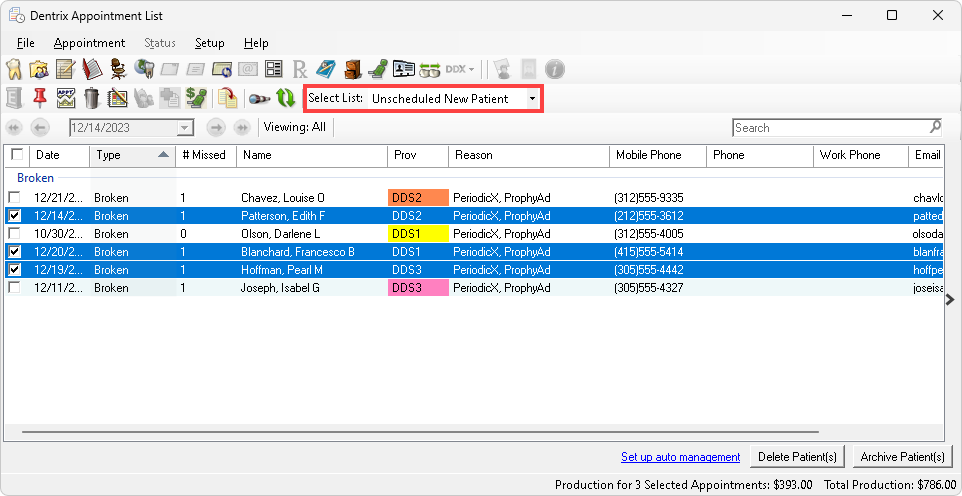
After following up, you may determine that some of these prospective patients are not going to work out. If so, from the Unscheduled New Patient list, you’ll select these individuals and click Delete Patient(s) or Archive Patient(s), to clean up your database.
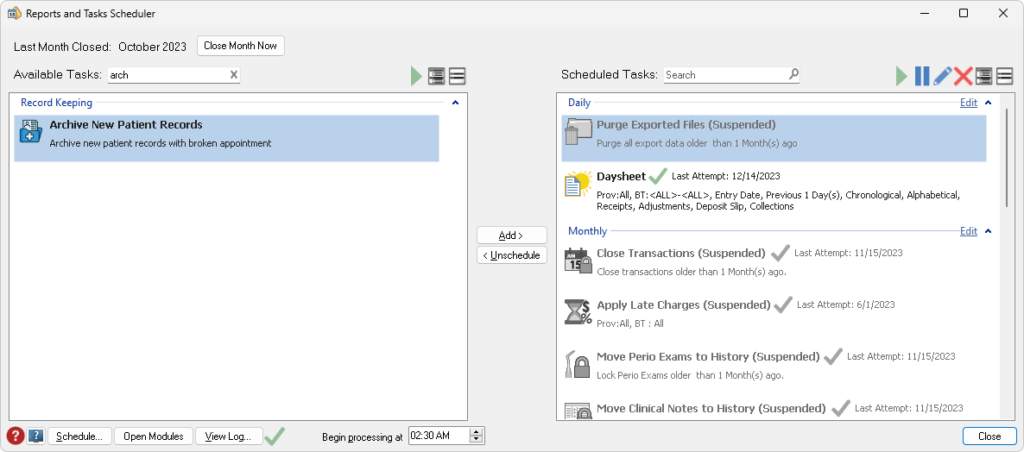
But, if that is too much work, you can set a task to run that will automatically archive any new patients with broken appointments. Cleaning up after absentees has never been easier!
We are announcing these changes early, so you can be ready when Dentrix Automatic Updates brings them to your office. Expect them to appear in an automatic in the coming months. When they appear, we hope you’ll be excited about the changes!
Learn More
Visit our New Patient Workflow page to see a side-by-side comparison of how the new patient workflow compares with what you are doing currently.